Alpine, SW Calgary

FLAKE EPOXY GARAGE FLOOR
IN ALPINE, CALGARY

From bare slab to Dovetail flake. A full strip and rebuild on a 575 square foot double garage. We jackhammered the wall base, removed the interior step, ground the slab, chased and filled every crack, then laid the moisture barrier, the epoxy base, and a full broadcast of Dovetail flake, all locked under a thick polyaspartic topcoat.

System
Full Flake
Finish
Dovetail
Size
575 Sq Ft
On Site
3 Days
Location
Alpine, SW
The Challenge

A SHOW GARAGE
ON A BARE SLAB.

The client wanted a finished, show ready double garage, but the space was working against it. Raw builder concrete, an interior step breaking up the floor, and cracks already opening in the slab from Calgary freeze and thaw. Left alone, those cracks telegraph through any coating and the floor fails early. Same camera angle below, start to finish. No staging, no filters. Drag the handle.

Finished Dovetail full flake epoxy garage floor in Alpine Calgary Bare cracked concrete garage floor in Alpine Calgary before epoxy coating
Drag to compare
Before After
The Build

HOW THIS FLOOR
GOT MADE.

No shortcuts and no one-day promises. Every step done in order, the way a floor that actually lasts gets built.

01
Strip & Stair Removal

Tear It Back To The Slab

We jackhammered the full perimeter wall base and removed the interior step so the coating and the flake cove run clean and unbroken around the whole room. Doing the demo first means no awkward transitions baked into the finished floor.

02
Diamond Grind & Edge Prep

Profile Every Inch

The open field gets a full diamond grind, then a handheld edge grinder cuts the same profile into every corner and wall line. All of it pulled straight into HEPA dust extraction, so the garage stays clean and the slab gets the tooth the coating needs to bond.

03
Chase & Fill Cracks

Cut The Cracks Out, Lock Them Shut

Every crack in the slab gets chased open with a crack chaser, vacuumed clean, and filled with a structural repair filler before any coating touches the floor. Smear filler across the surface and the crack telegraphs straight back through. Cut it out, fill it properly, and it stays gone.

04
Moisture Barrier & Primer

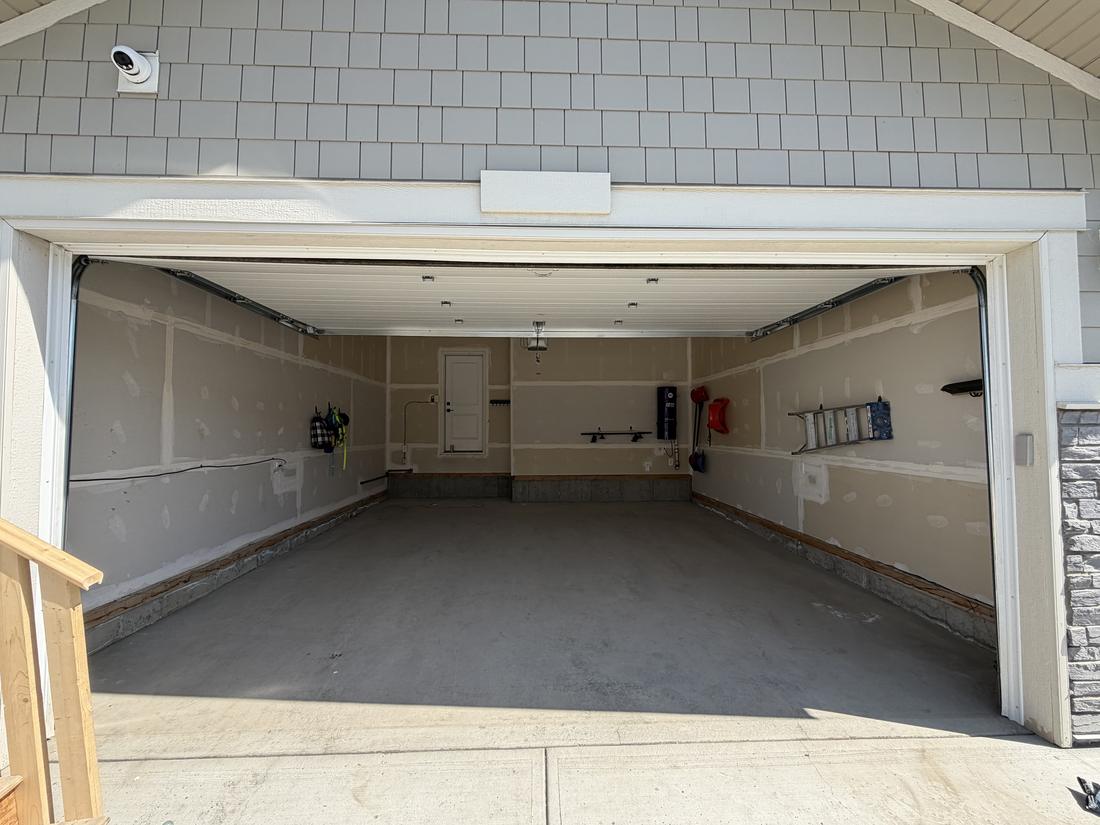
Seal The Slab Before Anything Else

This is the most important coat in the whole floor, and it goes down on its own, first. A moisture barrier primer soaks deep into the bare concrete and seals it. That locks the slab so moisture moving up through the concrete can never push the floor off later, and it lets every coat above it do one job instead of two.

Here is why that is a big deal. Moisture driven failure is the single most common way a coated floor lifts, and it is the one thing nearly every coating warranty in the industry quietly writes into the fine print as an exclusion. We do not play that game. A moisture barrier is standard on every floor we build, so we are protecting against the most common failure before it can ever start, instead of leaning on a clause to dodge the call later.

05
Epoxy Base & Full Broadcast Flake

Colour Down, Flake To Refusal

With the slab sealed, the pigmented epoxy base goes on and the Dovetail flake is broadcast straight into it while it is still wet, floor and cove, until no base shows through anywhere. Because the primer already owns the bond to the concrete, this coat is free to do one thing, grab and hold the flake. The next day the loose flake is scraped back and the surface is prepped tight for topcoat.

06
Polyaspartic Topcoat

The Wear Layer Goes On

A thick polyaspartic lock coat seals the flake, then the topcoat goes down as the wear layer. That top layer is what takes the traffic, the UV, and the hot tires for years while the flake stays protected underneath.

The Result

ONE CLEAN FLOOR,
EDGE TO EDGE.

The step is gone, the cracks are locked out, and the Dovetail flake runs unbroken across the floor and up the cove. A seamless, easy to clean surface built to take traffic, hot tires, and Calgary winters for up to 15 years. The parts most people never notice are the parts that separate a floor that lasts from a floor that peels.

Flake cove detail trimmed clean at the garage door threshold
Flake carried up the cove and trimmed clean at the door line, so the finish wraps the room instead of stopping at the wall.
Close detail of finished glossy Dovetail flake floor texture
Full broadcast Dovetail flake, sealed and glossy under a thick polyaspartic topcoat. Texture underfoot, depth in the light.
The Client

“I won't have to worry about oil stains on the cracked concrete.”

Peter, Alpine, SW Calgary

Questions

ABOUT THIS PROJECT.

How much does a flake epoxy garage floor cost in Calgary?

Pricing depends on square footage, slab condition, and system. A 575 square foot double garage like this Alpine project sits in the mid range. Use the instant quote tool for a real price range on your garage in under two minutes.

Does flake epoxy hide cracks in the concrete?

Flake hides surface imperfections, but cracks have to be repaired first or they telegraph back through the coating. On this project every crack was chased open, vacuumed, and filled with structural repair filler before any coating went down.

How long did this garage floor project take?

This Alpine project took three days on site: demolition and grinding, crack repair and moisture barrier, then base coat, flake broadcast, and polyaspartic topcoat. Timelines vary with slab condition and square footage.

Why does the floor need a moisture barrier?

Moisture pushing up through the slab is the most common cause of coating failure in Calgary, and the most common warranty exclusion in the industry. A moisture barrier primer is standard on every floor we build, so the most common failure is handled before it can start.

WANT THIS IN YOUR GARAGE?

Get an instant price range on a Full Flake floor. No callbacks required. No surprises.

Get Your Instant Quote